A Do-It-Yourself Chain Link Shopping List for the Fence Yard
A good plan on paper keeps you from making three trips back to the yard for one missing part.
October 8, 2026 · 3 min read
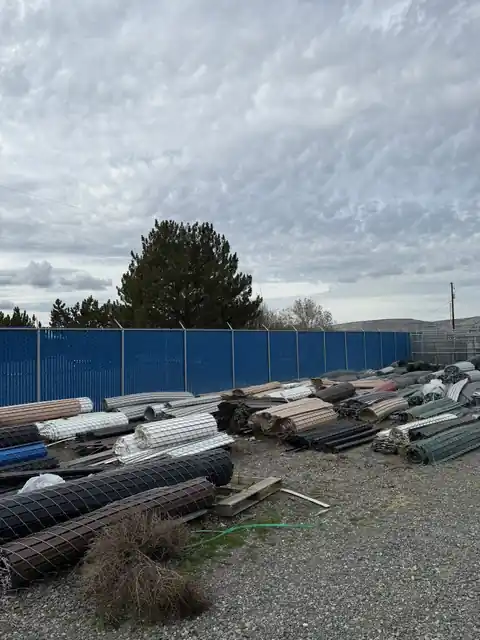
A chain link fence is one of the most doable fence projects for a homeowner. The parts are standard, the method hasn't changed in decades, and there's no sanding or staining. The hard part is the shopping. Order too little and you stop mid-job; order wrong and you carry parts back. L S Fencing keeps a yard on Swier Lane in Yakima where do-it-yourselfers are welcome, so here is how to arrive prepared.
Start with a sketch and a tape
Walk the line you want to fence and mark it with stakes and string. Measure each straight section and write it down. Mark every corner, every end, and every spot where a gate goes. Note the height you want and any slope along the way.
Call 811 before you dig anywhere on the line, and check with your city or county about height rules, setbacks, and property lines. Don't guess at where your boundary sits; confirm it before you set the first post.
Count your posts
There are two kinds of posts, and they do different jobs.
- Terminal posts go at corners, ends, and both sides of every gate. They're larger and carry the tension of the fabric.
- Line posts go between the terminals. They hold the top rail and keep the fence straight. A common spacing is about 10 feet apart, but ask what's right for the height and fabric you pick.
- Gate posts are terminal posts that also carry the weight of the gate, so they should be sturdier than the rest.
Count the terminals from your sketch first, then divide each straight run by the line post spacing to get the line posts. Round up and write the numbers down.
Top rail, fabric, and the parts that hold them
Top rail runs along the tops of the posts to keep the fence straight. It's sold in long lengths that slide together with sleeves, so figure the total run and ask how many pieces that makes.
The fabric is the chain link itself, sold in rolls. Match the roll height to the fence height you planned, and divide the total run by the roll length. Galvanized and black vinyl-coated are both available, so decide the color before you leave the house.
The hardware list
These small parts are the ones people forget. Bring this list with you.
- Tension bars: a flat bar that slides through the end loops of the fabric at every terminal post.
- Tension bands: the clamps that hold the tension bar to the post.
- Brace bands, rail end cups, and carriage bolts: the hardware for connecting the top rail to the terminal posts.
- Post caps and loop caps: they keep water out of the posts and hold the rail at line posts.
- Tie wires or fabric ties: they fasten the fabric to the line posts and the top rail.
- Gate frame, hinges, latch, and gate fabric, or a complete gate panel if you'd rather buy it built.
- Concrete for every post, plus a way to dig the holes.
Setting posts and stretching fabric
Post holes should be deeper than most people expect, and the posts need to be plumb and aligned along the string line. A general rule is to bury roughly a third of the post's length. Check local frost depth for your area. Let the concrete cure before you pull any fabric.
Fabric goes on after the terminal posts have set. Unroll it along the line, attach one end to a terminal post with a tension bar, then stretch it tight toward the other end. A stretcher tool pulls the slack out evenly. Tie it to the line posts and the rail as you go. If you've never stretched fabric, ask about renting the right tools.
Walking into the yard
The yard at 1711 Swier Lane holds rolls of chain link and slats and stacks of gate panels, and the sign says plainly that do-it-yourselfers and walk-ins are welcome. Hours are Monday through Thursday, 8 to 4, closed Friday through Sunday. Summer is their busiest season for both jobs and walk-in customers, so plan the trip around that.
Bring your sketch, your measurements, and a photo of the area. Call (509) 452-3000 with questions before you drive over. L S Fencing has been a family fence company in Yakima since 1974, and if one part of the job, like the gate, is more than you want to take on, ask about having the crew handle it.
L S Fencing, (509) 452-3000
Call (509) 452-3000More articles
Privacy Slats on Chain Link: When They Make Sense in the Yakima Valley
Slats turn an open chain link fence into a screen, and they come with trade-offs worth knowing before you order.
Galvanized or Black Vinyl Chain Link for a Front Yard
Both fences keep a yard contained, but they look and wear differently once they're standing in front of your house.